What equipment do you need to start tufting?
You want to get into tufting but don't know where to start with the equipment? Don't panic! After 2 years of intensive practice in my workshop, I'm sharing everything you really need to create your first pieces. 🧶
No endless list or unnecessary equipment, just the essentials, explained simply.
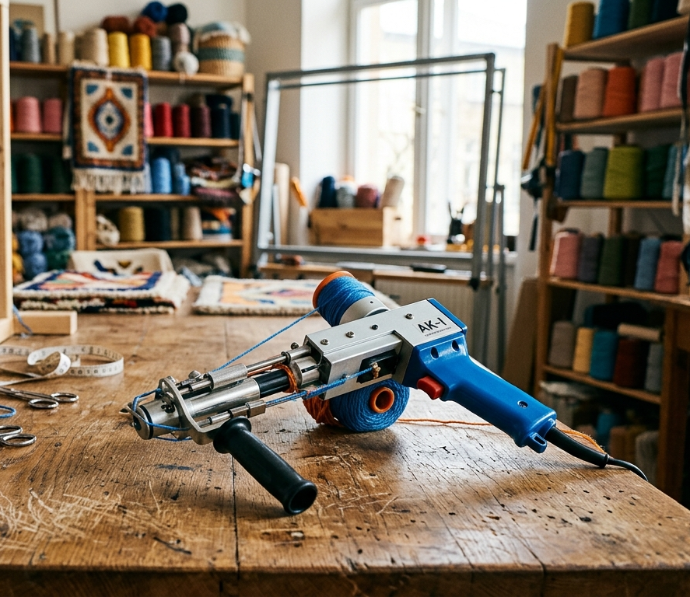
1. The Tufting Gun
This is the star tool of tufting, the one that brings your creations to life. There are two types depending on the desired finish:
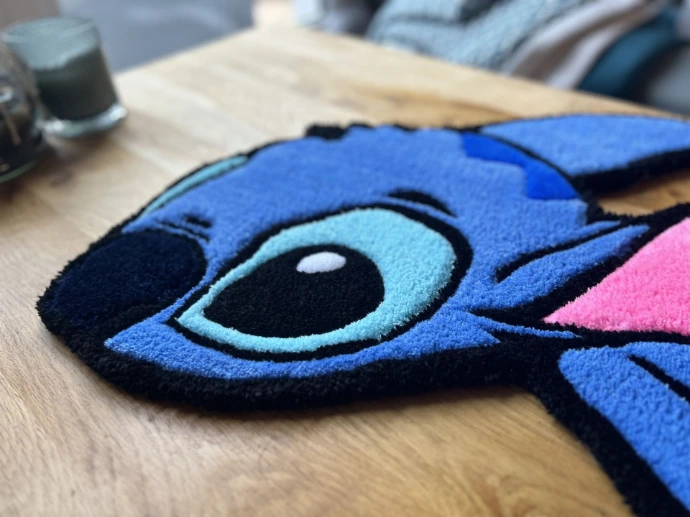
✂️ Cut Pile : the threads are cut, resulting in a soft and dense velvet finish. This is the style I use for all my Clotopia creations!
〰️ Loop Pile : the threads form loops, for a more textured and graphic finish.
💡 My beginner's advice: start with a cut pile gun — the finish is cleaner and hand shearing is easier to master.
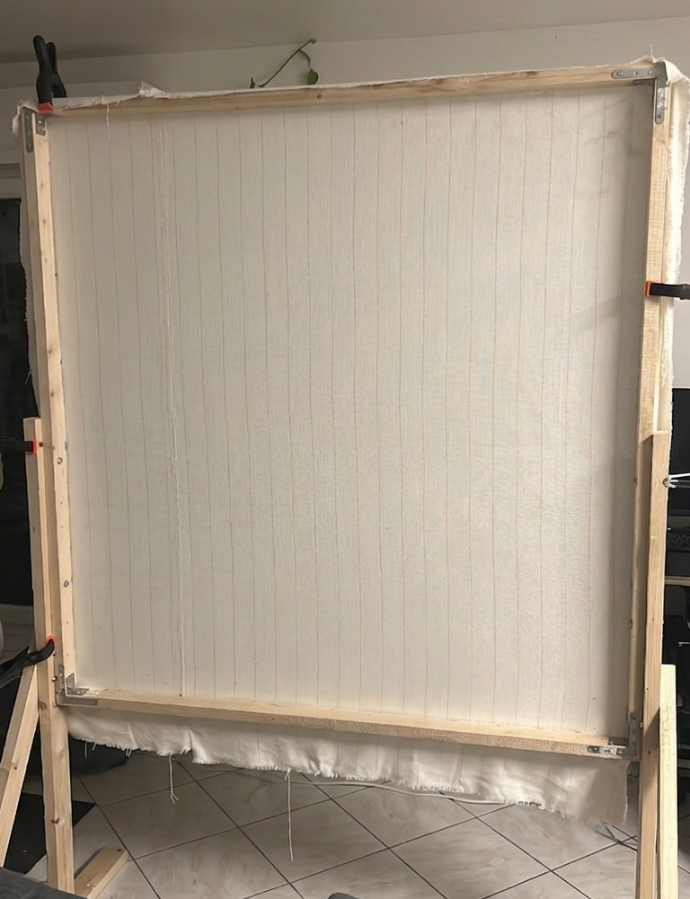
2. The Frame
The frame keeps your canvas taut throughout the work, it's the foundation of everything. Without a solid frame, the canvas distorts and the finish is uneven.
Two options:
🪵 Homemade : 4 wooden boards, grippers, and a few hours of DIY. Economical and customizable to any size!
🛒 Bought ready to use : more convenient for beginners, available in specialised tufting shops.
💡 My advice: start with a 60x60 cm frame, large enough for a real project, small enough to remain manageable.
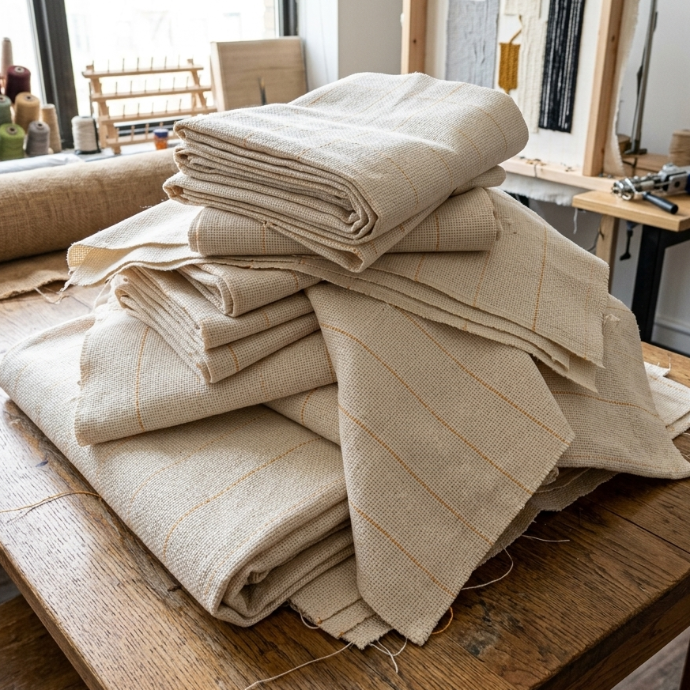
3. The Primary Canvas
The primary canvas is the support on which you will tuft. It must be strong enough to withstand the repeated passage of the gun, and soft enough to allow the threads to pass through.
The standard: the Monks Cloth (a monk's cloth), a loosely woven cotton canvas, ideal for tufting. It can be easily found online in specialty shops.
⚠️ Never use a standard canvas or an unsuitable fabric, it will tear quickly under the gun!
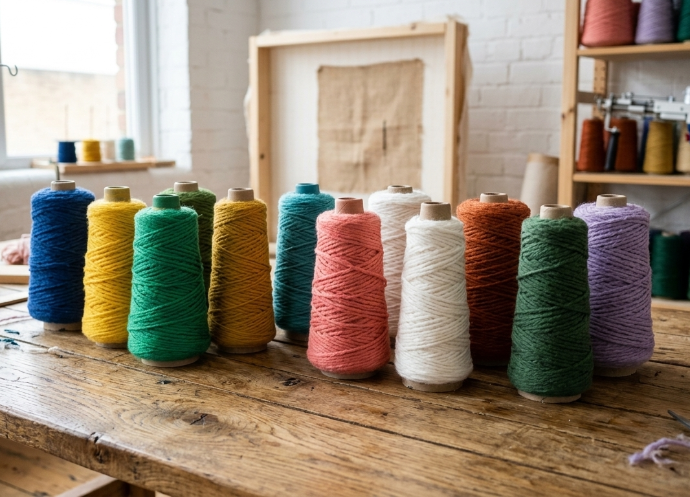
4. The Threads
The choice of thread is crucial, it determines the final appearance of your piece. To start, two main options:
🐑 Natural wool : soft, noble, premium finish. More expensive but beautiful.
🧶 Acrylic : durable, wide range of colours, more accessible. This is what I mainly use at Clotopia!
💡 My advice: start with acrylic to learn without breaking the bank. Switch to natural wool when you master the technique.
🎨 Need help choosing your colours? Try Yarnator ! Import your image and automatically get the colours and quantities of thread you need!

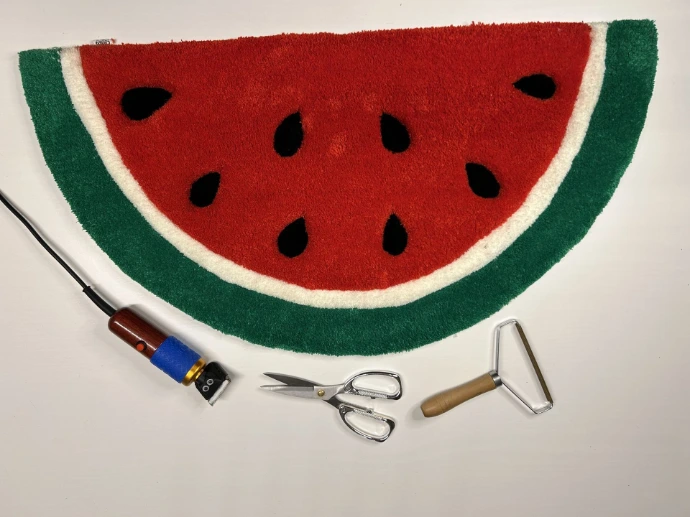
5. The Finishing Tools
Finishing is what transforms a "homemade" rug into a true professional piece. The essentials:
✂️ Scissors : to cut the threads and adjust the edges
🪒 Tondeuse textile : pour tondre et égaliser la surface (c'est mon moment préféré !)
🗜️ Colle à tapis : pour fixer les fils au dos et solidifier la pièce
🟤 Tissu de finition : collé au dos pour un envers propre et antidérapant
Quel budget prévoir ?
Matériel | Budget débutant
Pistolet à tufter | ~150€
Cadre | 50 - 100€
Toile primaire | 10 - 20€/m²
Fils acrylique | 20 - 50€ / kg
Outils de finition | 30 - 50€
Total | ~260 - 370€
C'est un investissement initial, mais le matériel dure des années, et chaque pièce créée le rentabilise un peu plus 😊

Et après la création ?
Une fois votre tapis terminé, il faut aussi savoir l'entretenir pour lui garantir une longue vie ! 👉 Consultez notre guide d'entretien complet →
Vous préférez acheter plutôt que créer ?
Découvrez toutes mes créations touffetées à la main, tapis, coussins, repose-poignets et accessoires. 👉 Voir la boutique Clotopia →